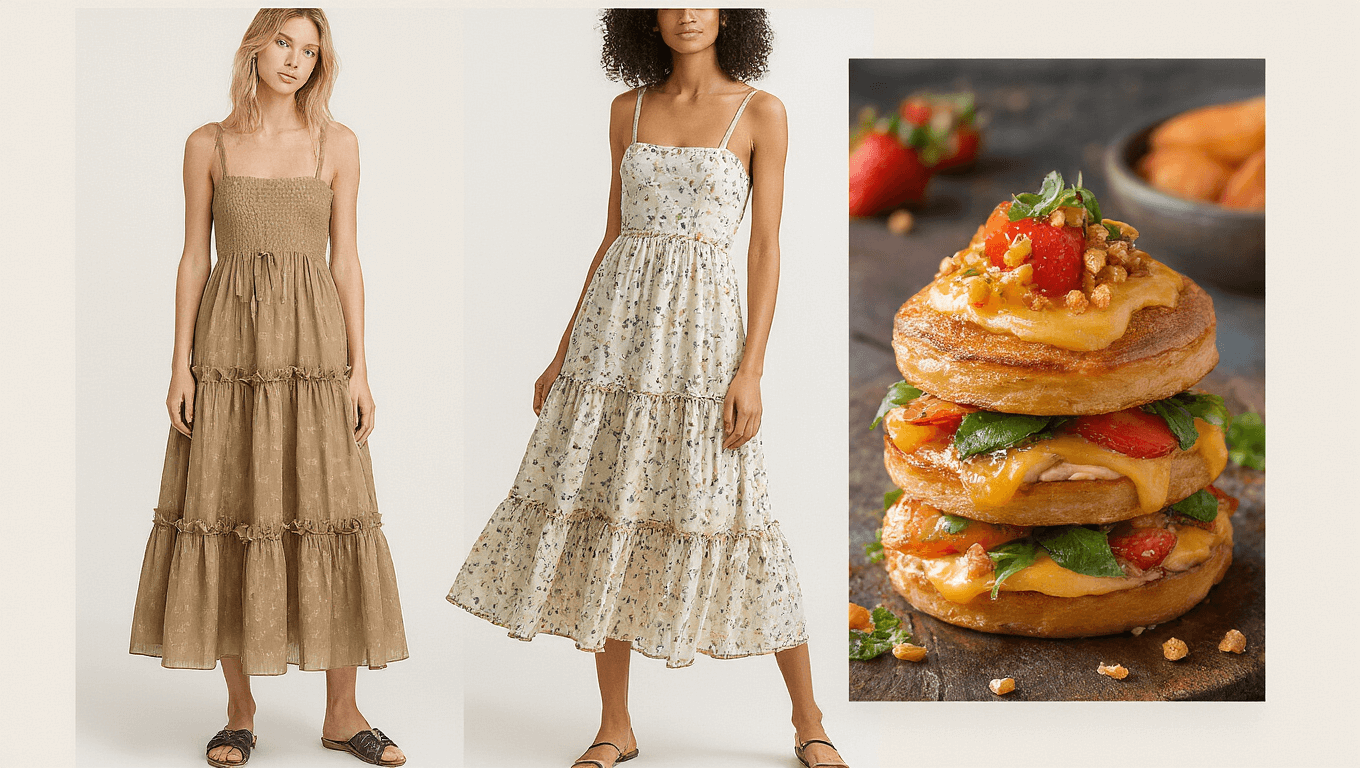
Tiered chiffon midi dresses are taking over my closet, and honestly, I’m not mad about it.
You know that feeling when you find a piece that makes you feel effortlessly put-together? That’s exactly what happened when I slipped into my first tiered chiffon midi.
I used to think these dresses were too fancy for everyday wear. Boy, was I wrong.
These floaty, layered beauties have become my go-to for everything from coffee dates to garden parties. And the best part? They’re way easier to style than you’d think.
")
What Makes a Tiered Chiffon Midi Dress So Special
Contents
Let me break this down for you.
Tiered chiffon midi dresses are basically the fashion equivalent of a warm hug. They feature lightweight, semi-sheer chiffon fabric that’s layered in tiers (hence the name). The hemline hits right at mid-calf, which is incredibly flattering on most body types.
Here’s what I love about them:
- The movement – Every step creates this gorgeous, floaty effect
- Versatility – Dress them up or down depending on your accessories
- Comfort – No restrictive fabrics or uncomfortable fits
- Romantic vibes – Perfect for those days when you want to feel feminine
The layered panels create visual interest without being too busy. And that mid-calf length? It’s like the sweet spot of dress lengths – not too short, not too long.
")
Quick Facts Before We Dive In
Time commitment:
- Daily styling: 30-60 minutes
- Weekly outfit planning: 1-2 hours
What you’ll need:
- The dress (obviously)
- Basic accessories like comfortable block heels
- A camera or phone for outfit pics
- Good lighting (natural light works best)
Budget range: $45-$130 for most styles
Difficulty level: Beginner-friendly (seriously, these are hard to mess up)
")
The Essential Tools for Styling Success
I’ve learned that having the right pieces makes all the difference.
Camera setup:
Your phone camera is totally fine for this. I use my iPhone for 90% of my outfit shots. If you want to get fancy, a ring light helps, but honestly? Stand by a window and you’re golden.
Must-have accessories:
- Statement earrings (they frame your face beautifully)
- A crossbody bag or small clutch
- Shoes that complement the dress’s vibe
- Light cardigan or denim jacket for layering
Optional but helpful:
- Reflector (or just use a white poster board)
- Tripod for hands-free photos
- Delicate gold jewelry for that effortless look
")
Setting Up Your Perfect Outfit Shot
This is where the magic happens.
Location matters:
I’ve found that simple backgrounds work best. A plain wall, your bedroom, or even outside against some greenery. The dress should be the star, not your messy bookshelf in the background.
Lighting tips:
- Golden hour is your friend (that’s about an hour before sunset)
- If you’re indoors, face a window
- Avoid harsh overhead lighting – it creates unflattering shadows
Angles that work:
- Full body shots to show the dress movement
- Close-ups of the tier details
- Action shots (like walking or spinning) to capture the flow
")
Step-by-Step Styling Guide
Here’s my foolproof method for styling these beauties.
Step 1: Start with the basics
Put on the dress and look at yourself in natural light. What’s the vibe you’re going for today? Casual coffee run or elegant dinner date?
Step 2: Choose your footwear
- Sneakers for a casual, unexpected twist
- Sandals for summer garden party vibes
- Heels for date night or work events
- Ankle boots for fall transitional looks
Step 3: Add accessories strategically
Less is usually more with these dresses. Pick 2-3 accessories max. I usually go with earrings, a bag, and maybe a delicate necklace.
Step 4: Layer if needed
For cooler weather, throw on:
- A cropped denim jacket
- Light cardigan
- Leather moto jacket for edge
Step 5: Capture the look
Take photos in good light. Try a few different poses to show how the tiers move. Trust me, the movement is half the appeal.
")
Color Palettes That Never Fail


")
[…] midi pencil dress with bow detail is basically a fitted, mid-length dress that hits somewhere between your knee and […]